Actually all that worked already before the previous post. I had to do couple of changes to the calibration functions because now images are monochrome and before RGB, but otherwise everything was in order.
I had some problems on master dark being white, but I found out that to be because the program was reusing old temporary dark#.tiff files. Master bias was subtracted once every time I ran the program causing values of uint16 go below zero. I now changed the program to use float32 during the process and output int16 only when everything is ready. Also temporary files are now manually removed before every new test run.
I noticed ImageMagick can do affine transformations based on matching pairs. Just what I need! It's a lot faster than Scikit-Image, which I won't be needing anymore so one less dependency to worry about. I could probably do a lot more with ImageMagick as well so I have to look into that some more. This project isn't about coding everything by myself. It's about getting astronomical image stacking done on open source software. Hence, ImageMagick is fine.
Next I think I should make some kind of a project file which holds information about temporary files and which can be removed and which reused.
So here's the first result of full calibration process.
That's of course not what my code outputs. Postprocessing has been done with Darktable. Bigger version again on Flickr: http://www.flickr.com/photos/96700120@N06/10427590704/
I addition to project file I'll start working on interpolating calibrated raw images into RGB.
Btw, the whole process takes now 7 min 30 s. That's for 30 bias, 10 dark, 7 flat and 30 light frames. That's quite good, I think.
Information, instructions and general writings about my hobbies with stargazing and open source software.
Tuesday, October 22, 2013
Monday, October 21, 2013
Unexpected problems with image alignment
Continuing the development of pyAstroStack (I have to come up with a better name for it...) and I ran into problems where I didn't quite expect them.
I'm also starting to find out that when I thought I knew what happens in the image registration and stacking, I'm actually missing quite a lot. I knew about the Bayer filter in DSLR, but seems like I misunderstood how it's used. I thought there are 12M red pixels, 12M blue pixels and 24M green pixels in 12Mpix sensor, when there actually are 3M red, 3M blue and 6M green. I also didn't understand that converting a raw photo into fits or tiff with DCRaw's (or Rawtran's) default settings, doesn't give me the real raw data. So the first version of my program used interpolated color data from the beginning. I started to fix this.
I had difficulties understanding Rawtrans switches but I knew what I had to do with DCRaw in order to get debayered data from raws. Rawtran gave me FITS, but DCRaw PPM or TIFF. I wanted my program to output TIFF so I decided to change AstroPy.Fits to something that uses TIFF. I found Pillow. It can also import images into numpy.arrays, so I should be able to do the transition easily...
I made a lot of changes before sunning proper tests. I tried to include dark, bias and flat calibrations at the same time and when I finally ran tests, all the resulting images were mostly black. I removed functions about calibration from my test program but to no effect. I stretched images to extreme and found this:
Seems to me like registration fails. I really couldn't understand this since I hadn't touched anything related to registration. All the changes were in image loading and stacking. The weirdest thing to me was, why alignment fails only for Y-coordinates and X is ok. It took me a while to figure this out. I reverted to older, working, version of the code and started making all the changes to it one by one and running tests after each change. Pillow and TIFF was the cause. Still I couldn't understand why until I ran everything using FITS but the output as TIFF. Result was perfectly aligned image, upside down! Either TIFF handles coordinates in different order than FITS or just Pillow-library makes the numpy.array with flipped Y, but now that I knew the cause, it was simple to fix.
Star coordinates were fetched on SExtractor using FITS even when everything else used TIFF so the Y-coordinate was always reversed. I simply changed the Y SExtractor gave into Ymax - Y and everything worked.
My plan was to have calibration done by now, but this mix up of coordinates took more time than it should. Reminds me how amateur I still am...
I'm also starting to find out that when I thought I knew what happens in the image registration and stacking, I'm actually missing quite a lot. I knew about the Bayer filter in DSLR, but seems like I misunderstood how it's used. I thought there are 12M red pixels, 12M blue pixels and 24M green pixels in 12Mpix sensor, when there actually are 3M red, 3M blue and 6M green. I also didn't understand that converting a raw photo into fits or tiff with DCRaw's (or Rawtran's) default settings, doesn't give me the real raw data. So the first version of my program used interpolated color data from the beginning. I started to fix this.
I had difficulties understanding Rawtrans switches but I knew what I had to do with DCRaw in order to get debayered data from raws. Rawtran gave me FITS, but DCRaw PPM or TIFF. I wanted my program to output TIFF so I decided to change AstroPy.Fits to something that uses TIFF. I found Pillow. It can also import images into numpy.arrays, so I should be able to do the transition easily...
I made a lot of changes before sunning proper tests. I tried to include dark, bias and flat calibrations at the same time and when I finally ran tests, all the resulting images were mostly black. I removed functions about calibration from my test program but to no effect. I stretched images to extreme and found this:
Seems to me like registration fails. I really couldn't understand this since I hadn't touched anything related to registration. All the changes were in image loading and stacking. The weirdest thing to me was, why alignment fails only for Y-coordinates and X is ok. It took me a while to figure this out. I reverted to older, working, version of the code and started making all the changes to it one by one and running tests after each change. Pillow and TIFF was the cause. Still I couldn't understand why until I ran everything using FITS but the output as TIFF. Result was perfectly aligned image, upside down! Either TIFF handles coordinates in different order than FITS or just Pillow-library makes the numpy.array with flipped Y, but now that I knew the cause, it was simple to fix.
Star coordinates were fetched on SExtractor using FITS even when everything else used TIFF so the Y-coordinate was always reversed. I simply changed the Y SExtractor gave into Ymax - Y and everything worked.
My plan was to have calibration done by now, but this mix up of coordinates took more time than it should. Reminds me how amateur I still am...
What next?
Maybe now I can work on the calibration. For what I've understood the procedure is
- masterbias = stack(bias)
- masterdark = stack(dark - masterbias)
- masterflat = stack(flat - masterdark - masterbias)
- stack((light - masterdark - masterbias)/masterflat)
Also colouring the images would be nice. As I said, the first images were made from interpolated raws and now I'm using properly debayered (I think). After calibrations I should interpolate monochromes into colour images with a correct bayer mask. If I'm right about how it's done, it doesn't sound too fast of an operation on Python. Perhaps PyCuda here? Some introduction to PyCuda I read said it's at its best on calculating numpy.arrays.
Sunday, October 13, 2013
New project: pyAstroStack
It has been bothering me that there are no free stacking software for astrophotographers for Linux. I've heard PixInsight is awesome and I have no doubt, but it costs money. I wonder why no one has ever made a free (as in freedom) alternative. Maybe because there are decent free (as in free beer) programs such as DSS, Regim or IRIS (which I compared here).
I decided to try and code one myself. I basically understand a lot of the mathematics involved. I've studied programming a bit alongside physics and mathematics so I thought I might have the skills... Still there has been some problems where I least expected them. For example making an affine transform for a data matrix was surprisingly difficult.
So now I announce:
pyAstroStack
An open source stacking software for astronomical images
For now the program is extremely limited. It works from command line and is configured by editing the source code. It also does stacking only by average value, doesn't calibrate images with dark, flat and bias, saves result only in three fits (one for each colour channel)... But it works for my test data! That's when I thought I'd make this public.
My test data was the best astrophoto I've taken. Not much as you can see, but nevertheless it is my best. Here's the first successful result of my own code.
![]() |
| Andromeda, stacked with pyAstroStack and postprocessed with ImageMagick and Darktable |
Here's the same image on Flickr http://www.flickr.com/photos/96700120@N06/10240315086/in/set-72157634344389164
And here's the same stacked with Iris http://www.flickr.com/photos/96700120@N06/10002768985/in/set-72157634344389164
The code can be seen in Bitbucket. It's licensed under GPLv3. I hope this'll go somewhere and that I have time and resources to make it easier to use and install. If you read this far, I assume you are somewhat interested in the project. Awesome. If you have any ideas on how to make the registering faster or reduce the number of required Python libraries, I'm all ears.
Feel free to add enhancement or proposal ideas on issue tracker in Bitbucket.
The code can be seen in Bitbucket. It's licensed under GPLv3. I hope this'll go somewhere and that I have time and resources to make it easier to use and install. If you read this far, I assume you are somewhat interested in the project. Awesome. If you have any ideas on how to make the registering faster or reduce the number of required Python libraries, I'm all ears.
Feel free to add enhancement or proposal ideas on issue tracker in Bitbucket.
Sunday, September 29, 2013
Comparing DeepSkyStacker, IRIS and Regim
As I recently wrote, I've been trying to learn AstroSurf IRIS. I've been doing everything on DeepSkyStacker until this, but the result always seems too colourless. Sometimes it looks like grayscale, sometimes sepia... But rarely the colours seem real. I thought it's just my lack of skills, but seems like not necessarily. IRIS and Regim do give me colours on the same data where DSS does not.
On a side note: IRIS works quite well with Wine on Linux. The drag & drop dialog for raw conversion does not, but it's possible to convert raws using the command line. First you have to place the photos on IRIS's working directory and name them by the same theme IRIS uses in everything. This time I copied all the CR2s to /media/data/Temp/iris and renamed them andromeda#.cr2, bias#.cr2, flat#.cr2 and dark#.cr2. Then you just
> CONVERTRAW andromeda andro 31
where "andro" is the generic name for converted image and 31 is the number of pictures. Same for flats, biases and darks, of course. From there on everything seemed to work just as in Windows.
On a side note: IRIS works quite well with Wine on Linux. The drag & drop dialog for raw conversion does not, but it's possible to convert raws using the command line. First you have to place the photos on IRIS's working directory and name them by the same theme IRIS uses in everything. This time I copied all the CR2s to /media/data/Temp/iris and renamed them andromeda#.cr2, bias#.cr2, flat#.cr2 and dark#.cr2. Then you just
> CONVERTRAW andromeda andro 31
where "andro" is the generic name for converted image and 31 is the number of pictures. Same for flats, biases and darks, of course. From there on everything seemed to work just as in Windows.
DeepSkyStacker
Procedure is quite straightforward. You load lights, darks, flats and biases, start registering and DSS recommends the best settings for stacking method and else. The process takes a while and afterwards you have a "ready" photo. Of course there's still all the postprocessing do be done, but that I did in Darktable.
Here's the photo
![]() |
| Andromeda with DeepSkyStacker. Same on Flickr |
Regim
Procedure is even more straightforward than with DSS. You load lights, darks and flats (no biases possible) tell it to begin and after a while you have picture done. Usually the white balance is wrong but there are good automatic and manual tools for that. This time Regim's astrometrics recognized Andromeda and set the white balance correctly. Otherwise you have to set a B-V value
manually for some star in the picture. I've found these values in KStars, Stellarium or finally by googling stars name.
Regim also has an automatic gradient remover which works quite well, but as you see, I forgot to use it this time. Postprocessing was done in Darktable. I think I overdid the denoise on my first try. It looked too smudgy. Here's the second version.
![]() |
| Andromeda with Regim. Same on Flickr |
IRIS
IRIS has the steepest learning curve. I explained the procedure shortly in a previous post. Again the postprocessing was done in Darktable. This time I was more careful with denoise.
![]() |
| Andromeda with IRIS. Same on Flickr |
Results
An 100% zoom of the three images. You might argue that DSS gives just as much detail than the others, but I just couldn't get more than that on Darktable. I tried not to mess with colour profiles on postprocessing and show colours the stacking software gave. Of course I adjusted RGB balance in IRIS and did automatic white balance adjustment on Regim. Seems like they don't agree on this.
I like IRIS's colours the best. Level of details is about the same on Regim and IRIS. IRIS is no doubt the most difficult to learn, but while that, it also gives user a real insight on what's really going on in the stacking
Neptune found
Now I've seen or photoed every planet on this solar system (except for Earth of course). Neptune was the last to be caught.
I was taking photos of Andromeda and while camera was shooting I watched stars with my telescope. Star chart showed that Uranus and Neptune are south and to that direction I have a clear view. I had already photographed Uranus so I aimed for Neptune. I probably saw it on telescope but didn't recognize the star like object for a planet. With camera I had more luck. Neptune was in an easy place middle of stars visible on naked eye. I pointed my camera there and took couple of shots.
Afterwards came the more difficult task of comparing images to a star chart. KStars didn't show enough stars so I tried Stellarium which that too showed only stars up to magnitude of 10. That wasn't enough to recognize which spot is Neptune. I fought with it for a while by adjusting settings and downloading more star charts... Until I realized Stellarium has to bee restarted to make it use those new charts.
Here it is.
Wouldn't realize it's a planet if charts didn't show it. No wonder Galileo mistook it for a fixed star. With enough imagination you might see some blueish pixels on top of the dot. Those might even be real colours if I managed to set the balance correctly on IRIS.
Here's the image on Flickr. http://www.flickr.com/photos/96700120@N06/9949334363/
And here's the original whole frame. Good luck finding Neptune there: http://www.flickr.com/photos/96700120@N06/9997488305/
I still need photo of Mercury. Otherwise I have (some kind) photos of every planet. I've seen Mercury on naked eye and on telescope but at that time I had no camera to attach to telescope. Also my photos of Venus, Mars and Saturn are from a time before I had a Barlow.
I was taking photos of Andromeda and while camera was shooting I watched stars with my telescope. Star chart showed that Uranus and Neptune are south and to that direction I have a clear view. I had already photographed Uranus so I aimed for Neptune. I probably saw it on telescope but didn't recognize the star like object for a planet. With camera I had more luck. Neptune was in an easy place middle of stars visible on naked eye. I pointed my camera there and took couple of shots.
Afterwards came the more difficult task of comparing images to a star chart. KStars didn't show enough stars so I tried Stellarium which that too showed only stars up to magnitude of 10. That wasn't enough to recognize which spot is Neptune. I fought with it for a while by adjusting settings and downloading more star charts... Until I realized Stellarium has to bee restarted to make it use those new charts.
Here it is.
![]() |
| Neptune. At least according to Stellarium star chart. |
Here's the image on Flickr. http://www.flickr.com/photos/96700120@N06/9949334363/
And here's the original whole frame. Good luck finding Neptune there: http://www.flickr.com/photos/96700120@N06/9997488305/
I still need photo of Mercury. Otherwise I have (some kind) photos of every planet. I've seen Mercury on naked eye and on telescope but at that time I had no camera to attach to telescope. Also my photos of Venus, Mars and Saturn are from a time before I had a Barlow.
Thursday, September 26, 2013
Beginning to learn IRIS (Andromeda and Double Cluster)
Seem like I'm starting to learn stuff about astrophotography since DeepSkyStacker is starting to bug me a lot. It's easy to learn and does something nice, but the results aren't that nice to work with further. Everyone seems to promote AstroSurf IRIS as a free (as in free beer) stacking software. It's not that easy though.
To use IRIS you really need to understand what happens in whole process of stacking. I read some ebook about it (can't find the link) and I thought I understood it but seems I didn't. I think I finally understood it after following this guide: IRIS:tä aloittelijoille (sorry, it's in Finnish).
If I understood correctly, here's how it goes:
Then the photos:
Andromeda Galaxy. M31, M32 and M110 of the Messier objects. I took 31 of 18 second exposures. 20 s made the stars trail a bit but on 18 it was unnoticeable. First one was to check everything is in order and then 30 more. Photos were taken on my front yard. Luckily Andromeda was in such a position that none of the streetlights was in front of the camera. I also looked at it visually and I really have to say it was the most I've seen of that galaxy. Quite beautiful gray spot on ocular.
The Double Cluster: NGC 884 and NGC 869. While shooting Andromeda I looked through my 200 mm Dobson at everything I thought I might see. I realized I've never seen the Double cluster although it should be easy to find. It looked nice so after 31 exposures of M31 I took 30 of this. Same 18 second exposures than before.
To use IRIS you really need to understand what happens in whole process of stacking. I read some ebook about it (can't find the link) and I thought I understood it but seems I didn't. I think I finally understood it after following this guide: IRIS:tä aloittelijoille (sorry, it's in Finnish).
If I understood correctly, here's how it goes:
- Make master offset/bias, flat and dark. These are all important so don't forget to take them.
- Calibrate images ("light frames"). This roughly means subtracting processed flat and dark frames.
- Transform images into RGB
- Register, which means aligning images so that stars are exactly the same places in every photo
- Stacking itself
- Postprocessing (colour balance, colour profiles...)
Then the photos:
Andromeda Galaxy. M31, M32 and M110 of the Messier objects. I took 31 of 18 second exposures. 20 s made the stars trail a bit but on 18 it was unnoticeable. First one was to check everything is in order and then 30 more. Photos were taken on my front yard. Luckily Andromeda was in such a position that none of the streetlights was in front of the camera. I also looked at it visually and I really have to say it was the most I've seen of that galaxy. Quite beautiful gray spot on ocular.
- http://www.astrobin.com/57782/
- http://www.flickr.com/photos/96700120@N06/9949337453/ - Same than above but without Google messing it up.
- http://www.flickr.com/photos/96700120@N06/9949231034/ - Alternate version
- http://www.flickr.com/photos/96700120@N06/9672634410/ - My previous best Andromeda. Quite a development. Gear is the same.
The Double Cluster: NGC 884 and NGC 869. While shooting Andromeda I looked through my 200 mm Dobson at everything I thought I might see. I realized I've never seen the Double cluster although it should be easy to find. It looked nice so after 31 exposures of M31 I took 30 of this. Same 18 second exposures than before.
- http://www.astrobin.com/57786/
- http://www.flickr.com/photos/96700120@N06/9949341193 - Same than above but without Google's resizing it.
Monday, September 9, 2013
Test run on Raspberry controlled camera (and some nice photos)
I never got around to testing the camera controlling script I wrote on Raspberry Pi before now. I don't remember the internals of the script but luckily I made it extremely easy. I had Raspbian on a SD-card, I installed Gphoto2 and Gcc (required to compile usbreset) and took Raspi on balcony with EQ3-2 and camera.
It took me a while to set up networking (cable out of window) so I could control Raspi remotely but when I had it all set up, everything worked perfectly. I turned the camera to face brightest star I saw (Altair), focused the camera and took some test photos. Here's a single shot with 200 mm focal length, 30 s exposure time and ISO1600. Quite good considering I'm taking these in a city not long after sunset.
Sky was clear. All the crappiness from my camera.
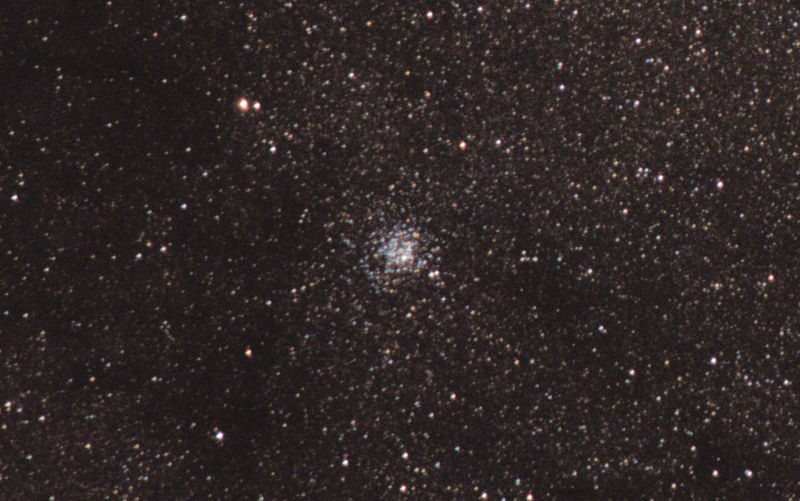
From a star chart I saw that M11, Wild duck cluster, should be nearby my "calibration" star Altair. It was quite easy to locate the cluster and after couple of test photos I got it centered. Later on I noticed M26 is just a bit down and turned the camera there. It fit easily on same photo. Here's some results:
Last time I tried to upload a photo this size, Google automatically resized it so here's the original on Flickr if that happens. I also put this on Astrobin.
Nova.astrometry.net is a nice service of astrometric plate solving. The software is free, but I still haven't got around to installing it. It wasn't trivial. Meanwhile this service works. Astrobin also does the plate solving but for some reason it doesn't show me the annotations on full resolution image. That would be nice. Anyways, I got this from nova.astrometry.net:
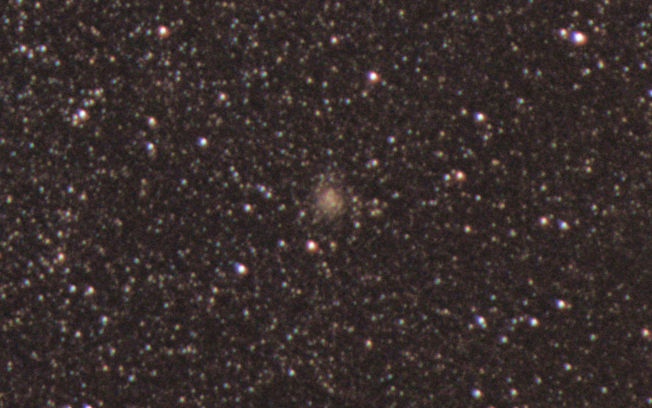
Quite a lot in one photo. Some of those I cut in their own pictures:
It took me a while to set up networking (cable out of window) so I could control Raspi remotely but when I had it all set up, everything worked perfectly. I turned the camera to face brightest star I saw (Altair), focused the camera and took some test photos. Here's a single shot with 200 mm focal length, 30 s exposure time and ISO1600. Quite good considering I'm taking these in a city not long after sunset.
Sky was clear. All the crappiness from my camera.
Benefits of Raspi system
I can't take too long exposures. With 200 mm focal length it seems 25-30 seconds is maximum. EOS 1100D can do that. Why this Raspi setup is nice then?
- More than 10 shots at a time. With just the camera I can take 10 at a time, then have to go and press the trigger once more. This is surprisingly annoying.
- Automatic upload to NAS. I sat at my computer and watched new photos flow in. With just the camera I have to look at test photos from its screen. Now I saw them instantly on a good screen and following adjustments were a lot easier to do.
- Automatic naming of photos. I have way too many photos named IMG_4244.CR2 and such. I organize them according to date and object but when unloading the camera I have to remember everything I tried to capture.
I'm considering of building some kind of system for Raspi to control EQ3-2's motor. Last night I had to get up, go out and turn the camera a bit. Come back inside and check results. Then the same again for n times. I've been told the motor on EQ3-2 is way too slow for this so perhaps I'll think some other solution... Anyways, to business:
The test photos
![]() |
| Whole view with M11, M26, NGC 6712 and NGC 6704 |
Nova.astrometry.net is a nice service of astrometric plate solving. The software is free, but I still haven't got around to installing it. It wasn't trivial. Meanwhile this service works. Astrobin also does the plate solving but for some reason it doesn't show me the annotations on full resolution image. That would be nice. Anyways, I got this from nova.astrometry.net:
![]() |
| Source of annotated image: http://nova.astrometry.net/user_images/75597#annotated |
![]() |
| M11 - Wild duck cluster |
![]() |
| M26 |
![]() |
| NGC 6712 |
![]() |
| NGC 6704.... I quess. Move along. Nothing to see here. |
Subscribe to:
Posts (Atom)